 click to Home |
Ski & Board General Articles To Articles | ||||
|
SnoZone
Endless Slope Ski & Snowboard Surfing Xtreme Chimp
|
Subject Categories Children Article
GC1.
Should my Child Ski or
Board? Exercise and Conditioning Article GX1. 4 Simple Exercises Article
GX2.
Get
a grip! e3 puts power into the palm of your hand
Article GX3. Keeping our Balance Article GX4. Developing Proper Ski and Snowboard Balance Article GX5. Three Things That Can Improve The Way You Ride Article GX6. Fundamentals Key to skiing and Riding Article GX7 Preparing for a fun first day
Equipment / Accessories Article
GE1.
Wax the Board Article GE2. Ski Swap Guide Article GE3 Snow Accessories (Glasses, Gloves, etc...) Article GE4 Dress for the snow
Article
GC1
Sam Morishima
I
am often asked by parents, “should my child (ages 3 to 7 years) first
learn to ski or snowboard?”
Unless, there are strong peer pressures from friends or family insisting
the child snowboard, it would be best if the child have at least one year
of skiing prior to snowboarding.
Skiing as their first feet bound snow sport allows several advantages.
First they are going to learn to stand up faster on skis.
They can maneuver to the chair lift easier, and move through lift
lines smoother. Getting use
to the logistics of handling the snow environment of a ski resort the
first year can grease the runway for snowboarding in later years.
Balancing with feet attached to something is going to be a key element to
whether a child is going to have fun or be frustrated with the sport.
On skis they can move both feet independently, making it easier to stay
balanced. In the earlier
stages of skiing having the legs and feet in the pizza slice position for
balance, slowing down and stopping doesn’t involve having the ability to
make independent lower and upper body movements which is critical from the
start in snowboarding.
Anatomical reasons for why a child may take to skiing easier than
snowboarding is that the child’s head is larger in proportion to the
rest of the body than in an adult. Therefore, the child’s center of mass
is higher up in the upper chest compared to that of the adult’s lower
center of mass in the abdomen area near the belly button.
This high center of mass can easily throw off the balance of a
snowboarder which already requires greater ankle and foot strength for
balance.
Also, young children commonly have difficulty flexing their ankles to put
the snowboard on edge.
If you are uncertain and your child doesn’t have a strong preference for
snowboarding maybe the best first choice is skiing.
If however your young child goes snowboarding it is important that adults
assist them.
Here are a few guidelines for the assisting adult: Have the child wear wrist guards to minimize wrist injuries. Show them how to spread the impact of the fall to minimize injuries.
When the assisting adult is also a snowboarder, make sure the child is to
their toe side when getting on the lift. This way if the adult needs to
give assistance to the child for example, getting off the lift, the adult
is already facing the child and doesn’t have to twist and contort their
body to hold up a falling child, which would be the case if facing on
their heel side.
Assist a small child to the chairlift loading area by gently pushing or
pulling the child while both the child’s feet are strapped to the
binding. Small children who
try to scooter kick their way are very slow and awkward.
Also, having both feet in the bindings makes it easier to unload. Small
children often don’t have the strength and coordination to unload with
just the front foot attached. Remember
with a small board the bindings are placed close together and that there
is no place to put a loose foot during unloading.
Whether the child is skiing or snowboarding with adults stay on terrains
that is appropriate for the child’s level.
Even if a child seems to be able to handle the terrain, if it’s
beyond their level it can create very lasting bad habits.
What I found to be the most important experience builder with small
children is to go at their pace allowing for stops at the lodge for a
relaxing warm-up with a hot chocolate and conversation.
The time spent warming up at the lodge with them is just as
important as the time spent on the slope. The ideal way to introduce the child to either sport is before you go to the snow. A go on the Endless Slope at SnoZone is a perfect way to observe the ability of your child to adapt to the sport. Able to watch close up at his or her progress as they learn the proper way to negotiate the skis or board and begin establishing the correct body placement and habits required for good fundamentals that allow the child to grow and advance in the sport. Get them off to a great and enjoyable start on an Endless Slope.
Subject: Exercise and Conditioning Article
GX1
By Sam
Morishima Wondering
how you can ease yourself into preparing for this winter's activities.
Try these 4 Simple but effective exercises to get you ski and board
ready. One
legged balance: Balance
on one foot. The key is to
keep the ankle of that foot relaxed and flexed. With the other foot,
pretend the big toe is a pencil and write out the letters of the alphabets
on the ground in front. Then
switch onto the other foot and again write out the alphabets letters.
Focus on being relaxed throughout your body making sure that the
ankle you are standing on is flexed and acting like a spring. Make sure you can feel equal weight all along the bottom of
the foot you are standing on. Every
once in a while flex the ankle a little, shifting most of the weight onto
the ball of the foot. Then
return the weight so it is along the whole length of the bottom of the
foot again. This will build your fore and aft balance. Write out the
alphabets a couple times on each foot.
Do the following 3 times a week, three sets each, resting for one minute
between sets
Side Hops:
Stack some books about 6 to 8 inches high.
Stand on the left side of the stacked books. Jump over the books
leading with your right foot, landing on your right foot on the other side
of the books. Then making
sure your balanced on your right foot jump over the books to the other
side leading with your left foot and landing on the left foot.
Use ski poles to aid in balance.
Repeat the hops 15 to 20 times.
Ankle, Calf and Achilles Builder:
With your forefeet on a step and holding onto a railing, slowly
raise yourself with your feet. Keep
your knees slightly bent (do not lock your knees).
Then lower yourself, until your heels dip lower than the step.
Repeat the cycle 15 to 20 times.
Sitting Wall:
With a ball the approximate size of a soccer ball between your
thighs, lean against a wall, sitting in an imaginary chair with your
thighs parallel to the floor. Hold
the position working up to three minutes.
Squeeze the ball at the same time. These exercises will pay off with dividends on those runs called Burn-out, Endless mile, Traumatized, The Wall, Bottomless Pit, etc… Good Skiing and Boarding! www.endlesslope.com
Subject: Exercise and Conditioning Article
GX2
Get a Grip! E3 puts power in the palm of your Hand By Sam Morishima US Ski
Team members Tom Rothrock (Slalom racer) and Dane Spencer (Giant Slalom Racer)
prepare for another practice run down the mountain. These two future USA
hopefuls are practicing with something no other skier has practiced with before
to help improve their skiing performance. As they grasp their poles their hands
wrap around a specially made grip handle. Pushing
off from the starting gate their fingers close down on the molded hand piece -
the thumb bearing down on the grips ledge and the little finger and index
wrapping tightly around a narrow waist that feels ergonomically natural for
them. Rothrock and
Spencer’s ski poles are equipped with a new style handgrip from BioGrip
company called e3. The
handgrip enhances the skier’s balance and stability through the hands natural grip
by aligning and balancing several muscle groups throughout the body, increasing
the athletes agility, speed and strength while reducing strain. The e3 grips works on the basic principle of stabilizing the
shoulders, back and hips with the underlying premise that the human body is an
interactive physical structure of multiple interlinking components, rather than
a collection of isolated body parts attached to a central longitudinal frame.
The e3 grips help modify mechanical behavior throughout the body by
placing the shoulder and hip girdles in more inherently stable positions and the
axial skeleton in a balanced vertical alignment. The results of these
important changes are more efficient muscle use that improves balance, mobility,
and strength. The
grips without the poles are also being used for balance training in the hands of
top snowboarders Mike and Tina Basich and Shannon Dunn
to help fine tune their balance. Jasey-Jay Anderson 5x Crystal Globe Overall
Champion in snowboarding has been using the grips to improve his balance for
over six years. Does it really work? Can just the way you position your
hand’s grip make such a significant difference in the performance of your
skiing and snowboarding? Hand
position has been an important aspect in martial arts delivering rapid and
powerful blows from a stable base stance. In
fact the idea of the hand position originated from studying the martial arts. I’ve used the e3 grips with my students in my ski and
snowboard lessons to help them position properly over the skis and snowboards
for the development of intricate movements.
The students perform and improve faster and develop the movements in a
more relaxed and comfortable way compared to those not using the grips.
A noticeable improvement is the balancing and holding of the skis’s
edge when the student uses the e3 grips.
I currently ski with the e3 grip poles and have noticed that I tire less
using them. The e3 has been used previously in other sports,
especially running. Dean Brittenham,
who recently retired from the Shiley Elite Athletic Excellence Health Resource
Center at Scripps Clinic in La Jolla, California, stated, "I saw immediate
and dramatic improvements in the running form and agility in the athletes using
the e3 grips. I believe the e3 grips are a major breakthrough in improving
athletic performance." Beth Alford-Sullivan, former Women's Coordinator of
Cross Country Track and Field, Stanford University, noted after a demonstration
that the runners using the grips, "showed immediate improvement in each
athlete's running form and stride." Peter Maher, 1988 and 1992 Olympic
Marathoner, said that, "After using the e3 regularly, I have developed a
far more relaxed and injury-free running form." Peter also indicated that
the soreness he was experiencing in his hips disappeared. Olympian and American woman’s discus record holder
Suzy Powell practices her discus throwing using the grips and has broken her own
record. Suzy remarked "By
using the e3 grips and principles in my training, I have witnessed remarkable
improvements... As I prepare for my third Olympic team in 2004, I know the
grips and my improved biomechanics will give me a competitive advantage." The inventor of
these hand orthotics is Stephen Tamaribuchi one
of the nation's top consultants for prevention of repetitive strain injuries.
The e3 grip technology is a result of twenty years experience in the
field of human biomechanics, working with both sports athletes and
"corporate athletes" suffering from repetitive stress injuries.
He realized that hand position could help people and athletes properly
maximize their workouts and strengthen the proper muscles for various
activities. I was fortunate to meet
Stephen at the time he was beginning to work on placing the grips onto ski
poles. He personally made me one of
the first e3 ski poles to try. Since,
that time it is the only pole I prefer to use.
As a consultant he works with athletes improving their
performance through optimal biomechanics. He
has helped both athletes and non-athletes to improve how they use their muscles
to perform various activities from typing to sprinting.
Beside the athletic use the grips are locally used by Medical
Professionals at Radiological Associates (RAS) in all of their imaging and
treatment rooms as well as the Sutter and Mercy Cancer treatment centers. When I asked Stephen why he developed the e3 he stated: "My hope is that the e3 grip will allow people of all ages and physical condition to perform better in sports and daily activities. I particularly want to help people who are suffering from joint, balance, and mobility problems. I believe the e3 can significantly improve their quality of life." By the way Per
Lundstam Men's conditioning coach and assistant in Men's GS and Downhill
was
so grateful to Stephen that he gave him one of Bode Miller’s slalom skis that
he had won a race with. Now when I
ski with Stephen he leaves me so far behind that I’m glad that he has the
courteous of waiting for me at the lift lines.
I swear those skis of Bode’s has wings.
The interesting thing is Stephen is so well balanced he makes optimal use
of those lightening boards of Bode’s. Guess
what’s in the palm of Stephen’s hand? e3! Information
on Stephen Tamaribuchi and on his e3’s can be found at his website : www.biogrip.com
.
Subject: Exercise and Conditioning Article GX3 (Skiing
keeps you balanced) By Sam Morishima
We
are living longer and we find we need to constantly strive to maintain an
active quality life style.
With longer life expectancy our retirement age increases, making it all
the more important we keep fit, healthy and productive.
Though the aging process affects all bodily systems two important areas
that can prolong our quality of an active life are, preserving our dynamic
balance and maintaining the musculoskeletal system.
Balance is multidimensional meaning that it is a very complex dynamic
state requiring the contribution of several body systems to create
balance. Your sensory, motor
cognitive and musculoskeltal systems all work in harmony to create
balance. Movement is a series
of many repetitive intervals of going off balance and reestablishing
balance throughout change of positions. Normal movement appears continuous
and smooth because each new balanced interval position is short with rapid
repetitive recovery times. Even
the act of standing requires complex interaction of the mind and body
systems. Remember for most of
us it took more than 2 years from the time of our birth to accomplish this
feat.
In turn the quality of our balance affects our active performance. For
example any small affect in our balance can result in reduction in speed
in our ability to field a baseball, return a tennis serve, or block a
basketball shot.
The negative age-associated changes such as delayed somatosensory inputs
and/or an over dependence on vision to control balance are likely to be
very subtle at first and difficult to detect.
Many falls in the mature adult are the results of such decrease in
balance. Falls can lead to
permanent damages for older people since falls can be exacerbated by weak
bone structure resulting in serious broken bones such as in the hip area.
One of the many body systems that contribute to good balance is the
musculoskeletal system with its skeletal alignment and muscular
integration. Good posture
with a strong skeletal stance aids the balance process.
By regularly performing dynamic balance activities you can improve the
multiple dimensional systems that make up balance.
One very demanding balance activity is skiing, which requires dynamic
balance and good athletic stance. In
skiing, it is vital that the body is aligned properly, allowing equal
pressure on both feet. However,
skiing on the mountain can have it’s own set of external hazards.
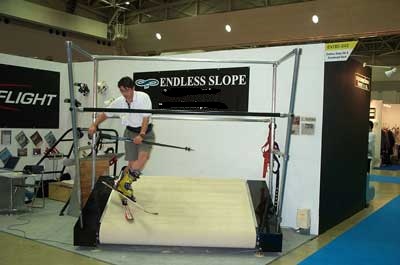
To avoid the dangers of skiing on the mountain yet provide the
benefits of skiing for developing and maintaining dynamic balance there is
the “Endless SlopeTM” a machine that allows you to ski in
the comfort of the indoors all year around.
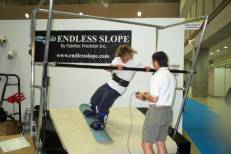
At the Endless Slope /Adventurous on Pier 38 in San Francisco or at
SnoZone ski and snowboard school in Sacramento you’ll discover that they
have combined the development of balance with the teaching of the fine art
of skiing. The student not
only establishes better balance but, does it while enjoying the thrill of
skiing in a comfortable indoor setting. Once
on the moving slope, you realize how tenuous balance is on a steep
mountainside. Except
here you're safe and comfortable and able to manage the ride because
you're aided by holding onto a bar in front of you and if you fall you are
caught by a safety belt.
As you strengthen the skills for skiing and boarding you won't rely on the
bar as much. But, in the
beginning you're truly grateful for the assistance.
You quickly upgrade you're balance and edging, learning what would
take years on the mountain to just matters of minutes on the Endless
Slope. The Endless Slope develops your feel for dynamic balance as you
carve your turns. There is a fantastic sensation of skiing on real snow. A
30 minute experience convinces you beyond a doubt the effectiveness of the
program. After only ten minutes on the "Endless Slope" you feel
like you've been on the mountain all morning. "This is great,"
you scream, thinking how wonderful it is to glide across a surface when
you are in balance.
After a half hour lesson you're smiling.
You realize the feel for balance and at the same time begin to
actually unravel the mystery to master the sport of
"Skiing and Snowboarding."
You may after time using the “Endless Slope” walk a little
straighter, bounce a little lighter in your steps, stand a little taller
all because you are developing a better sense for balance. At the USC University Hospital
a similar Ski Simulator is
used in helping rehabilitate patients who have injured themselves and who
want to ski or board again. The Ski
Simulator helps patients work on balance training and trunk
stability, as well as strengthening the lower extremity muscles. The Ski
Simulator has helped dramatically with body alignment,
strengthening the proper muscles also allowing some patients to stand up
taller stretching evenly the leg muscles loosing up the hips to walk
better. The “Endless SlopeTM”
is not just for the recreational sports person or someone in need of
sports rehabilitation. World
free style ski champion Mr. Bob Howard said: “You can quote me that I
would never have been a 3 time World Champion if it hadn't been for the
revolving ski deck. I am 100% sure it developed muscle and technique you
are unable to develop even on snow. I couldn't have developed that without
the muscle energy I gained by skiing on the deck. This doesn't mean
anything to anyone else but I am sure that the ski/acrobatic / Freestyle
training I have done on the deck every fall since 1974 has given me the
opportunity to perform and ski at my highest level for my age. I am 46
(year 2002) and soon to 47 and I am still flipping and twisting.” If you skied in the sixties
you will remember Suzi "Chapstick"
Chaffee who trained on the revolving ski deck to hone her ski ballet style
as well as the Olympic Gold Medalist freetyle mogul skier, Jonny Mosely
who trained on one for five years. Whether you are training for a World Championship, preserving the quality of your life or going through rehabilitation there is nothing like being “Balanced!” Ski for life! www.endlesslope.com
Subject: Exercise and Conditioning Article
GX4 Developing
Proper Ski and Snowboard Balance By Sam
Morishima Director of
SnoZone and Endless Slope / Adventurous ski and snowboard school
Recently I read several technical ski and snowboard articles where each
mentions the importance of balance.
However, not one article mentions how one can develop good balance
for skiing and snowboarding. So
how does one go about developing good balance for skiing and snowboarding? Watching
a rerun of the karate kid standing in a rowboat in the middle of a lake on
one leg in the so called crane position maybe the answer.
If you do not have a rowboat or a lake for that matter you maybe
out of luck. But wait (no I
will not sell you Genzu Knives), but instead provide you with a simple
balancing exercise which may just develop the balancing skill required to
improve your skiing or boarding. Goal: Improve your balance in the turn. Why: Being properly balanced prior to the turn will enhance the execution of the shorter radius turns that are required on steeper slopes and through mogul runs.
Do these exercises at home: Standing next to a table place one hand on it
for stability. Then lift one
of your knees so that the foot is slightly off the floor.
Now with the leg that you are standing on flex the ankle and in
doing so the knee will also bend flexing out in front slightly.
Keep your head up and eyes looking straight out.
Now carefully feel the pressure at the bottom of the foot your
standing on. Start off by trying to have equal pressure all along the
bottom of the foot. Rock
forward and aft until you feel the equal distribution along the bottom of
the foot. Notice how
important the role your ankle plays in your balance. You will feel the
ankle adjusting slightly to keep you balanced.
The ankle is critical in skiing and boarding as it fine-tunes and
adjusts the amount of edging and steering you place on the ski or board. Flex the ankle and notice that it pushes the knee forward
making the upper body move straight down.
Extend up on the ankle and your knees rise up and your upper body
moves straight up like a piston. Now
flex the ankle and repeat several times slowly.
Place the lifted foot down when you had enough balancing on
one foot. Now lift the other
foot and repeat the ankle flex and extension. The purpose of this exercise
is to get you comfortable with balancing on one leg.
This exercise will also strengthen the ankle.
As you develop the ankle you will not need a table to support you.
Try this while brushing your teeth or standing in line.
Another
version of this exercise is to stand on one foot with ankle flexed and
with the other foot writing out the alphabet with its big toe. Though I wish this was my idea it is actually from a student
of mine. She said her
daughter a professional dancer uses this exercise.
Important note:
Many skiers feel that the ankle plays a small part in skiing since
the ski boot which is very ridged prevents the ankle from moving.
They couldn’t be more wrong. There is actually quite a lot of
ankle movement required for both skiing and snowboarding either both feet
together or independently. The
real situation is, the ankle movement is vital for good skiing and
boarding. The critical movements of the ankle are fore and aft (flexing
and extending), rotational and lateral edging.
A slight ankle movement has drastic affect on ski or board edging,
pressure, steering and balance. Once
a rider develops the control of a fine-tuned ankle movement a high level
of skiing or boarding performance can be achieved.
Skiing
and Boarding is an acute balance sport where ankle strength and control is
vital for proper performance. For
both skiing and snowboarding the best way I found to develop balance is on
a revolving ski and board deck. If
you have an opportunity to get on one do so you'll be surprised how it can
improve your skiing and boarding.
Subject: Exercise and Conditioning Article
GX5 Three Things That Can Improve The Way You Ride! By Sam Morishima Coaches
around the world all preach the same statement; “ what are the 3 most
important things you can do that will make you excel at a sport?”
The answer; “Practice, Practice and Practice!” I
would like to add to this that, “if you are going to practice, practice
properly.” This is where proper
coaching and lessons are critical to not only your safety but proper development
and a successful out come. The last
thing you want is to establish bad or poor habits through improper training or
learning. When
it comes to lessons the more lessons you take the greater your
accomplishment level will be. To
ski or Snowboard correctly and well has a high entry level that one must overcome.
I
recommend taking 10 to 12 or more session programs that allows beginners
and intermediates to overcome such an entry barrier. Like
any sport it takes proper muscle development and coordination as well as
entrenching what we call muscle memory. It
is not the first 4 or 5 lessons that one obtains the needed skills to ride
properly but the last 2 or 3 sessions in a series of 10, 12 or more sessions
that one begins to ingrain the needed skills. There
is no magic formula that makes one a better skier or snowboarder - only hard
work, in the proper environment with the proper instructions. Remember,
good skiing or snowboarding is a habit and becomes as simple as walking as your
muscles and balance becomes naturally reactive to changing positions.
If
you have to think about it, it is usually too late to do something about it. Some
experts say it takes a week’s worth or more of focused practice or repetition
to develop just one new movement pattern into a solid skiing or boarding habit.
Given
the practice time, the right environment and focused instruction beginners can
easily become intermediates and intermediates can become expert. Like
any sport a little commitment can go a long ways! Good
skiing and boarding!
Subject: Exercise and Conditioning Article GX6 Fundamentals
Key to Skiing and Riding
By
Sam Morishima October
1, 2005 Why do we
love skiing or riding a board. It’s
the challenge of riding that keeps us in love with the sport. The challenge is what fuels our
thirst for more. The
changing conditions of snow and terrain demand that we adjust our
technique. However, most
skiers and boarders understand
only one technique and rely on it for all
conditions and situations. Being
satisfied with the way you ride forcing a one trick technique on
different terrains can be inefficient as well as becoming boring and
frustrating! Golfers
do not rely on one type of club or way to hit the ball but use a
different club and hitting technique that varies with the situation at
hand. Different snow,
terrain, slopes; etc demands different techniques
as well. So why do so many
skiers and boarders go for a one size fits all attitude limiting their
riding to one technique while a plethora of conditions exist; grooms,
powder, moguls, Sierra cement, mash potato, etc. each one having optimal
ways of riding? The reason being
is skiers and riders are not
receptive to learning other techniques.
Sure, you can
obtain different types of skis or boards meant to optimally ski or ride
different conditions but you still need to know how to use them.
Understanding and knowing how to execute the appropriate
techniques allow you to maximize the use of your skis or board. The most critical aspect to learning different
techniques is to ride in a manner that allows you to adapt to different
situations. In other words,
allow the body to feel the snow and the terrain so as to adapt to the
changing conditions. By
being receptive, your body can learn and
flow into the appropriate technique.
To prepare ourselves to accept and discover the
appropriate techniques we need to make sure are skiing and riding
fundamentals are in place. The
two most basic and critical fundamentals that can help us adapt and make
us receptive to different techniques are the same for both skiers and
snowboarders. Fundamental # 1: Staying flexed. Don’t
be stiff and upright. Flex and stay low and loose will give you better
control due to a lower center of mass adding to your stability and
allowing you to make shorter radius turns.
It also helps stabilize and absorbs shocks when the terrain becomes
icy and bumpy. Just
flex your ankles and knees. For
skiers, it is important that you flex
your ankles first otherwise just flexing and bending your knees will put
you on your heels causing
you to
sit back pushing the skis ahead of you and losing control of them. Fundamental #2: Allow your skis or board to initiate the turn not your upper
body and arms. For both
skiers and snowboarders use your feet to initiate the turns. The feet are the closest things on your body to the ski
or board and they have the greatest affect on the ski/board and snow
interface effecting the direction and movement of the ski/board.
For the skier, rolling the feet
(foot inversion little toe edge and foot eversion big toe edge) to
create an edge provides the turn for our shaped skis.
For the boarder A foot dorsiflexion results in a heel edge and
foot plantar flexion for a toe edge.
What is important to add for the snowboarder is to initiate the
toe edge turn first with the front foot slightly leading the back foot
with the plantar flexion. This
will give a smooth carved toe edge turn.
Allowing a feet first action provides you with greater
sensitivity to your terrain. By making sure our fundamentals are
solid will create a foundation for any skier and snowboarder to learn
and acquire new techniques.
Article GX7 Preparing
for a Fun First Day on the Snow By
Sam Morishima Are you ready for the
snow? Here are some tips
for a fun first day. Be and stay healthy:
Why? For two good reasons: Skiing
and snowboarding can be strenuous and second, the altitude and weather
can get to you. Skiing and snowboarding
are acute balance sports requiring specialized movements. The best
approach is to develop good core balance and to learn to ski and board
efficiently. Using
more feet and ankle muscles with body positioning rather than twisting
and pumping your body will result in smoother skiing and boarding and
less expenditure of energy. This will minimize the use of large muscle groups that cause
you to muscle your way through skiing and snowboarding. By balancing
better and using feet and ankle movement will allow you to ride the skis
and boards almost effortlessly.
You can improve your balance at home by just balancing on one leg
and trying to relax your feet and ankles.
Once you establish a
good sense of balance then building stamina in your muscles with such
exercises as hopping over a stack of books or squatting puts the final
touches to getting your ski and snowboard body ready. To help you acclimatize to the altitude with its less dense
air you need to be rested up. Get
a good nights rest prior to heading up the mountains.
Once in the mountains begin your sport activity slowly remember
your body is trying to adapt to the lack of oxygen.
Because of the oxygen starvation occurring your heart is already
compensating by pumping harder and faster.
On the tissue level your cells are trying to adapt by increasing
their respiration activity and fluid loss is increased. So drink plenty of water and take antioxidants like vitamin C
rich foods. Antioxidant
vitamin supplement (vitamin C, vitamin E, and lipoic acid) have shown to
significantly improved symptoms of altitude sickness.
Eating carbohydrates for energy might be a good thing as well
minimizing the chance for hypothermia.
Things you should avoid are Caffeine, Alcohol, and Nicotine. Such chemicals cause dehydration and vasodilation increasing
the loss of heat from your body. Protect
your self with sun block. The
sun’s ultraviolet rays are responsible for sunburn reactions with some
UV rays (UVB) having a major role in causing skin cancer as well as
other UV rays (UVA) going deep into the skin resulting in pre-mature
skin aging changes such as wrinkle formation.
Just
to let you know the SPF ratings are ratings that apply only to the UVB
rays that cause the cancer and not the deep penetrating UVA rays that
can cause pre-mature aging. SPF
15 sunscreen blocks 92% of UVB rays and SPF 30 sunscreen blocks 96% of
UVB rays. By the way the
effectiveness of the sunscreen depends upon the amount applied to the
skin. Most people do not
apply enough on therefore cutting down the effectiveness of the SPF 30
to a reality level of SPF 7 to 15.
So follow directions on how much to apply to utilize the maximum
capability of the sunscreen. If
you don’t want to pre-maturely wrinkle like a prune look for a
broad-spectrum sunscreen that contains agents that effectively blocks
the UVB and UVA rays. I’ve
heard that the broadest protection are sunscreens with SPF 30 or greater
with added UVA blockers such as titanium dioxide, zinc oxide, Parsol
1789 Avobenzone) and Mexoryl-Sx. But
do some research of your own - don’t just take my word for it. Hey,
if you ever find a sunscreen that is broad-spectrum that has a high SPF
rating, doesn’t sting the eyes, stable, water-resistant, is well
tolerated, non-toxic, cosmetically nice and inexpensive let us know. Next,
protect your eyes. We spoke of UVB rays - the ones that burn the skin - and they are
the ones that can damage the eyes. Combined with cold wind and
reflection off the snow, UVB has the potential to cause snow blindness (photokeratitis),
a temporary blindness lasting 12 to 48 hours with very painful problems
with the cornea of the eye. Regarding
the UVA rays- current
research says they are primarily absorbed within the lens of the human
eye – but who knows what the future studies will find out.
There are discussions though that talk about the possibility that
the UVA rays can hurt your central vision, damaging the retina at the
back of your eye (macula.) Most
sunglasses should block at least 70% UVB and at least 60% of UVA.
However, good sunglasses will block at least 98% of both.
Great sunglasses claim to block 100% of the UV rays.
These great sunglasses are usually made with polycarbonate, glass
or plastic (CR-39). This is
why you shell out the big bucks for those great shades. Check the rating
on your sunglasses and buy to protect. This
is the end of part one on a three part series on prepping yourself for a
fun first day in the snow. Part
two will discuss Clothing, helmets and equipment.
Part three will discuss getting to the slopes - a checklist for
your car.
Preparing
for a Fun First Day on the Snow Part Two Hope
you read part one on exercise, acclimatizing to the altitude with proper
nutrition and hydration, protecting your skin and eyes.
If not then grab the previous issue of SSN and catch up but for
the rest who did let’s move forward with Clothing, helmets and
accessories. You
want to dress for success on the hill.
May it be battling the weather or trying to attract a significant
other as well as that most important reason so you can perform your
best. When selecting what to wear, think functional. Your garments should be durable, fit well to allow freedom of movement, keep you warm and dry. Dress in layers. In the mountains, be prepared for changeable and extreme weather. Wear layers of clothing, rather than one thick item. You can always take a layer off if you get warm. Think of three key layers. First layer (Base Layer): his layer will help wick moisture away from your skin and to the outer layers, where it can then evaporate, thus keeping your skin relatively dry. Base layer garments are available in various weights to match activity level. Lightweight layers when it's warm or when you are really working up a sweat; medium or expedition weights when it's really cold or when you aren't exerting yourself, and thus generating little body heat. Wet garments that are in contact with your skin conduct 25 times more heat away from the body than dry ones. Avoid cotton- it absorbs many times its weight in water and loses its insulating qualities when wet. What works well as a first layer consist of a polypropylene shirt and pants or long thermal underwear made of a synthetic fiber such as polyester that has 'wicking' ability to move moisture away from your body. Second layer or Middle layer trap warm air next to the body. The thicker the layer of trapped air, the warmer you'll be. Two or three light weight layers are preferable to a single heavyweight one, because you can adjust the amount of insulation you're wearing to your activity level and to fluctuating temperatures. A good rule of thumb is: shed a layer before you get too warm and begin to perspire. The same applies when temperatures cools down all you do is add a layer before you begin shivering. A great second layer is a light - weight wool sweater or fleece pullover and pants. Note: Cotton clothing and blue jeans are poor choices because they won't keep you warm when they get wet. Third or top or outer layer is your protection from the elements, minimizing heat loss from wind and cold. Remember that even a gentle breeze can suck warm air from your body through the process of convection. Regarding the top layer look for a waterproof, breathable outer shell that lets perspiration escape while protecting you from wind, snow, and rain. A good outer layer should consist of a water-resistant snow pants and a jacket to protect you from snow, sleet, or rain and to block the nasty wind. For a good snowboard jacket look for one that is loose fitting, comfortable, long enough at the back to cover your bottom to keep snow out of your pants, and high enough at the neck to keep out the wind and cold. Pants need to be comfortable and loose fitting. It may be nice to look for a pair with extra padding around the knees and bottom to protect you when you fall. Key features to look for in clothing. Check for freedom of movement yet provides warmth and protection. For boarders get a jacket shell with a long cut down to your hips that will keep your midriff warm and dry when fastening bindings, or on deep powder days. Look for tough, waterproof, breathable shell to stand up to plenty of abrasion and abuse. I like vents under the arm that help regulate your temperature. Open when hot; close when cold. Storm flaps covering all zippers help keep wind out. Zip-pulls (attached to zippers allow you to open and close the vents without removing your gloves. Look
for double or triple-stitched seams, and reinforced material on the
sides of the jacket shell, and knees and rear end of your pants.
Remember you now have some investment on you so be careful as you
carry your skis and board with their sharp edges that can cut through
the stitching and material on the sides of your jacket or pants, or
through your gloves. Let’s
move on up to your head. For
minimizing heat loss from the head and protecting the little used
portion of your body a helmet can be a good thing to have. We
won’t discuss the fancy helmets with on board computer, GPS, tele-communication
and entertainment center features but just how to look for a good
fitting helmet. To
start with lets determine the size.
Wrap a measuring tape around your head just above the eyebrows.
This is the helmet size. Now
go to the store and try on the helmet by first aligning the front rim of
the helmet above your eyebrow. Then
holding the straps on both sides roll the helmet over the back of your
head. The
first thing to look for is gaps. Feel
the pads press on your head. They
should be flush against your forehead and cheeks.
Make sure that the back of the helmet does not touch the nape of
your neck. Fasten
the chin strap making sure it is snug and feels comfortable.
Then try to roll your helmet off your head.
A good fitting helmet will make your forehead skin move as you
try to roll the helmet. You’re
not finished yet. Make sure your goggles or if you are going to wear glasses
that they fit well with your helmet. Also, do you listen to music then
check the use of ear phones on it.
Does your ears get cold make sure that the ear covering on the
helmets cover and fit well. Not
all helmets are built the same. Some
work with Charlie Brown’s head others fit better on Jug Head’s. So
try various ones. Once you
know the helmet fits well then go for the colors, design, venting
features, communication capabilities and such.
Other Important Clothing Items Sunglasses
or goggles to protect your eyes from harmful solar radiation,
the wind, and to keep ice pellets or snow from stinging your eyes.
Remember bright sunlight reflecting off the snow can be just as
bad as direct sunlight. Select
goggles that allow for appropriate range of peripheral vision.
Look for wide-angle frames or sport shields.
Sunglasses and goggles also come in specific tints to help you
see dips and bumps in the snow on a dull day.
Here is a general rule regarding lens color tint and
applications. First
polarized lens are great for reducing glare and can come in various
tints: Polarized Gray is suitable for all light conditions especially
bright sunlight and offer a 10 % VLT (Visual light transmittance). Polarized
Brown best in moderate light allowing increase contrast, improve depth
perception and offer a 12 % VLT. Polarized
Green best in moderate to bright sunlight offering 16% VLT. Polarized
Rose best for moderate to hazy light providing the sharpest contrast and
offering 19% VLT Looking
at the non-polarized lens lets start off with the: Clear
lens- suitable for very low to no light conditions which is usually a Clear Crystal Carbonate lenses that are great
to protect your eyes from rain and bugs and at night time offering 98%
VLT (VISUAL LIGHT TRANSMITTANCE) Yellow
lens- suitable for
all “low-light” conditions such as cloudy, overcast, dusk &
dawn. Low-light lenses increase contrast and visual acuity and is a
yellow crystal
carbonate offering a 80% VLT (VISUAL LIGHT TRANSMITTANCE)
Orange lens- suitable for all “medium light” conditions such as partly sunny, cloudy, and overcast conditions. Low-light lenses increase contrast and visual acuity and is a orange crystal carbonate offering a 57% VLT (VISUAL LIGHT TRANSMITTANCE) Lets now examine heat loss through the head. You can lose a tremendous amount of body heat through your head: cover it, and your feet and hands will be warmer. Hat or Cap for warmth (although it won't provide protection). Make sure that the hat or cap can cover your ears. Some jackets have a useful hood tucked into the collar. Wear a helmet to protect your head and for warmth. Fleece neck gaiter or facemask to protect your face when it's really cold. Wrist guards for snowboarders to prevent wrist injuries. Gloves or mittens made of waterproof but breathable fabrics. Snowboarding gloves and mittens often have a reinforced palm and fingers to stand up to the wear caused by balancing on the snow. Some also have built in wrist guards. Long , elasticized wrist or strapping on cuffs to keep out snow is a good idea. Socks with flat seams and stretchy material that doesn't wrinkle against your skin will minimize sharp pressure points against the foot. A thin liner socks (synthetic socks) covered by a thicker wool or pile socks or snowboard/ski socks works especially well. Avoid extremely bulky socks that can keep you from feeling connected to the ground, which is necessary for good control. Sunscreen should always be used to protect you from sunburn and chapping in cold winds. A lip balm will prevent your lips from cracking.
Suggested Clothing Check List ___ Hat/cap/helmet - warm and must cover ears ___ Thermal underwear - for added warmth on cold days ___ Sweater, vest, wool shirt etc… ___ Water resistant warm-up pants or ski pants ___ Parka or ski jacket - insulated, usually worn over a sweater. (most parkas and jackets are not water proof and will soak through on wet days. ___ Waterproof & Windproof jacket or poncho and pants - for those wet days ___ Sock liner/Sock ___ Gloves or mittens - water resistant ___ Waterproof Sun Block - #15 or higher ___ Face Mask or Scarf - protection from wind and snow ___ Sunglasses - for sunny days ___ Duffel Bag/Daypack/Knapsack - to keep your small things together ___ Clothing and equipment identification. Many ski items look alike. Mark all your equipment with your name. Use masking tape with your name for all rental gear. ___ Skis/Snowboard - Correct length - Binding adjusted for you by an authorized technician ___ Ski brake for skis, Retention device for Snowboarders ___ Boots - properly fitted ___ Poles - proper length ___ Ski/Snowboard Bags or straps - to protect and/or hold skis together during transport ___ Ski/Board Lock - to secure your equipment when not skiing Prepare for Winter Driving part 3This is part 3 of preparing for a fun first day. So if you had read the last two issues of SSN on getting ready through exercise, protecting your skin, eyes and head, keeping the right body temperature by properly dressing then you are now ready to prepare your car for the snow trip. Interesting enough I am writing this from a condo next to Heavenly ski resort in blizzard like conditions. We arrived after delaying our snow vacation a day due to the winter storm that made the road uncomfortable to travel on. Good thing I called ahead and spoke to the condo manager who advised us to stay in Sacramento and enjoy a good meal there because 5 feet of snow was covering the parking area and no sign of any snow removal equipment. Viewing the web cameras on www.endlesslope.com showed lines of parked cars on the road to South Lake Tahoe at Myers further reinforced our decision to not travel on the mountain road that day. So leaving the next day was a wise choice as the day was still cloudy but no 50 miles per hour winds and snow slashing down on us as we tried to desperately attach tire chains in the freezing cold. So lesson one is call ahead, check weather reports; use the technologies available such as Internet sites with the latest road conditions, weather forecast, satellite views, etc. to view the latest and forecasted weather and road conditions to help make your decision to travel or avoid impending situations. Ok so you’re going to travel during the winter and we need to focus on our vehicle. If you have the latest in all terrain type vehicle I can save you some reading here and you can skip this section and move directly to tire chains. But for us who lack transportation that has lost its new car smell and requires a bit more attention you need to read this carefully. Check
the following: Cooling system – Check the antifreeze/coolant level
and that they will provide adequate freeze protection. Brakes – have the brakes
checked. Battery – Check to
see if it is near the end of its warranty.
Check the batter cables and that the battery cable connection are
tight and corrosion free. Windshield wipers – Change the
wiper blades if worn or cracked and refill the wiper fluid. Make sure
you use wiper fluid that is made for cold they contain solvents that
will not freeze in most winter driving conditions or add
special solvents to your windshield washer reservoir to prevent icing.
Do not replace with water, as it will freeze. Inspect the engine hoses and belts for cracks, soft spots or
bulges. Defroster / heater – check to make sure they are in
working order. Head lamps- Check the car’s headlamps,
taillights and the interior lights making sure they all work properly. Exhaust system -Check they are working properly Other things I like to have are light thin rubber gloves that I can easily manipulate to hook attachments on the tire chain, knee pads so my knees don’t get soaked and a plastic or waterproof pad if I have to lay down on the snow trying to figure out why the chain doesn’t fit over the tire. A old not so important water-proof jacket and over pants to wear when out in the wet cold putting on the chains. We also carry a couple of two way radios one on me when I am changing the tire and the other for my wife who is sitting warmly and patiently in the drivers seat waiting for my signal to start the car up to move the vehicle forward or back to either position the tires or to loosen any existing slack so I can tighten the chains. With the two way radio she doesn’t have to roll the widow or open the door to hear me and stays nice and cozy in the car while I brave the elements. By the way she can also put on chains and has done so before we met but for some reason I always lose the toss and is the one that ends up with dirty jacket sleeves and cold hands. Another thing are plastic bags to put the wet jacket and over pants and to place the tire chains in after I take them off. This way you don’t have to fuss with trying to cram the wet dirty chains bag back into the original case. A towel or wipes are a good thing to have ready to clean myself off after putting or taking the chains off. A possible alternative is to carry $40 to have the chains put on and $20 to have them removed by the chain gang. So carry extra chain money if prices go up further during demanding times. When you are mouthing the words “how much is it to put on my chains,” inside your warm window sealed car and the person in the rubber rain gear outfit standing in the slashing rain/snow/sleet freezing weather raises more than one finger you got to multiple the fingers by 10 to get the dollar amount they are charging. If it is just one finger they raise it will either mean $100 or they don’t like you depending upon the finger that is raised. A good thing to have is an extra car key attached outside the car hidden in a secure place just in case you lock yourself out when putting on the chains or negotiating the price further. For emergency carry a tool kit that includes at least a
screwdriver, pliers and adjustable wrench.
Highway safety flares and/or markers with reflectors and a
battery jumper cable. I have most of these things in a duffle bag and call it my winter emergency kit and keep it in the trunk. In addition take along
water and thermos of your hot beverage, non-perishable food, blankets,
extra clothing, battery powered radio with spare batteries, a portable
DVD player, a good book and you’ll appreciate them on a
lengthy delay. Also, make sure your cell phone is fully charged. Sam Morishima
is a contributing editor for Sierra Ski News and director of SnoZone, a
ski and snowboard school offering lessons on an “Endless Slope.”
Subject: Equipment / Accessories Article
GE1
By Sam Morishima
Ever
think about the abuse the boards attached to our feet endure as we bash
through moguls, grab steep icy slopes, slam land from cliffs and boulder
jumps. Well I never did until
the board began to delaminate on me.
Sending back the equipment to the manufacturer they only laughed at
me saying look you got gouges as deep as the grand canyon, metal edges
missing or snapped off like dry twigs, and you want us to give you a new
board because the thing is delaminating, think again melon brain! So
I ski and board with great enthusiasm, what Boarder doesn’t!
It doesn’t mean I don’t love my equipment. Well now that I’ve grown up a bit (not much mind you) I
learned a thing or two about taking care of my board that I’d like to
pass on to my readers. You
need to wax your sticks or board every three to five snow days. Your
bottom sintered base pores needs to absorb wax not dirt which it will do
if you don’t maintain them. A
clean well waxed surface will give you a smooth glide over the pretty
white stuff. When the season
is over you need to clean and wax them before you store them.
What’s very vital is to wax your boards and skis once over the summer,
because wax maintains and provides hydration to the base (keeping them
supple and flexible.) If you leave your boards or skis un-waxed during the
off-season, dehydration can shrink the pores, pull the base away from the
edges, and can result in delaminating.
I learned this the hard way and now the board manufacturers are not
laughing at me anymore because I’ve got boards that hang in there. www.endlesslope.com
|